Many Blogger users wanted to use a slideshow technique in Blogger, but they don't have the idea to do it. This tutorial will tell you an easy and working way to put slideshow into post.
Embedding this slideshow into your post don't require you to use some heavy codes. Or you don't have to insert each and every image url in the source HTML yourself. This slideshow gadget provided by Picasa uses flash embed to put the slideshow on a page, so it's only displayable if you have Flash Player installed in your browser or computer system.
Just follow these steps which is a 2 minute work.
Procedure to add the slideshow
If you are using blogger then the photo you upload into your posts are actually stored on your Picasa Web Albums. The half of the work in done inside Picasa Web Albums, follow the steps
- Log into your Picasa Web Albums with your current Google account.
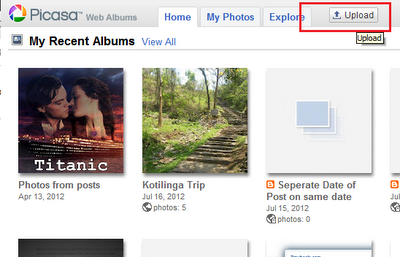
- When logged in you will see a upload button on top of the page,click it to upload your picture

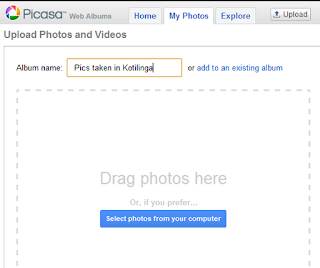
- A new page will be opened, name your Album and selection the files you want to upload by either clicking 'Select photos from your Computer' or dragging and dropping the pictures in the box. Just a quick example of it here.

- When the photos are successfully uploaded you now have to make the album Public, because photos uploaded directly through Picasa site are turned to private. You will see the privacy settings on right side (if it's already public then you can leave this step)
Click on the Edit > And when a new box appears, you will see a dropdown menu under 'Visibility', select 'Public on the web' and Save changes.


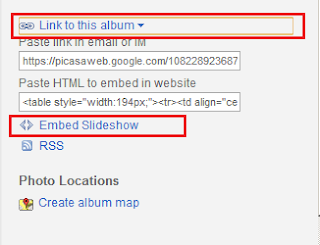
- Now you will see some extra options on your right sidebar after turning the album public (by following above step), you will see 'Link to this Album' > Now click on 'Embed Slideshow'.

- A pop-up will appear after you click on 'Embed slideshow', choose your settings. I recommend you to use the Large one, that's ideal for a blog. You will be given the code, click on the Yellow text area and copy the embed code.

Implementing the code in blog post
To implement the code into a blog post, create a new post. You have to switch to the HTML mode and then paste the copied embed code from Picasa into the HTML of the post. Switch to compose mode to see how it is looking.Tip - If also want to have texts in your blog post (obviously) then first put the embed code in HTML mode and then enter a character after the embed code of slideshow. When you switcht to compose mode you will have the character in the Compose mode to get a text writing point in the post.
Tip - Not only in post but you can also embed this gadget anywhere into your blog or website by placing it in the right place.
Yay ! That's great you have your own slideshow in your post. If you are a photography blogger then this tutorial will help. Drop your comments on how was this tutorial helpful to you.
